

Advisor Guide

Advisor's Panel Guide

ADVISOR'S PANEL GUIDE

How to navigate your Advisor's Panel

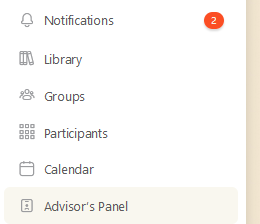
In your navigation menu, click the Advisor’s Panel option (on the upper right corner of your screen if you use a desktop computer).


Once the panel is open, you’ll have two main areas to manage: My Profile and Appointments.

Appointments tab

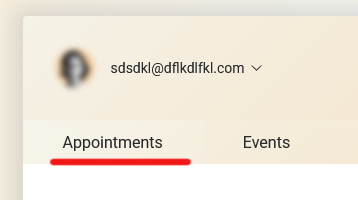
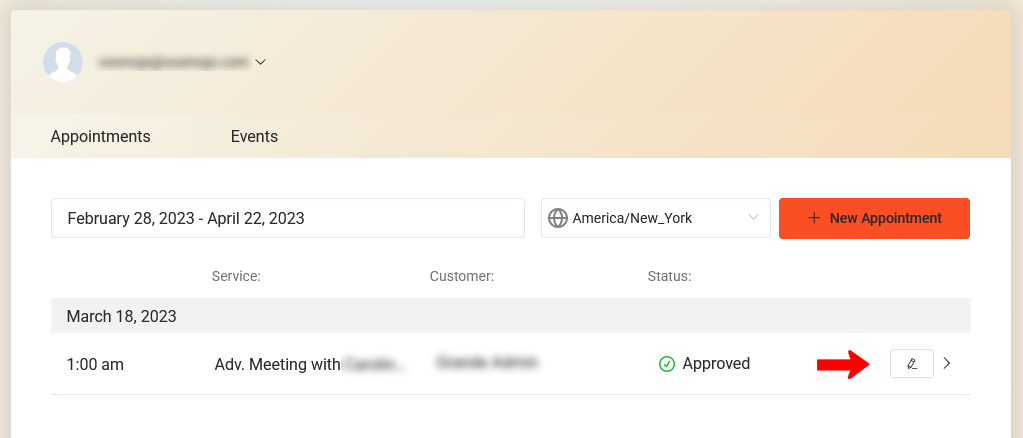
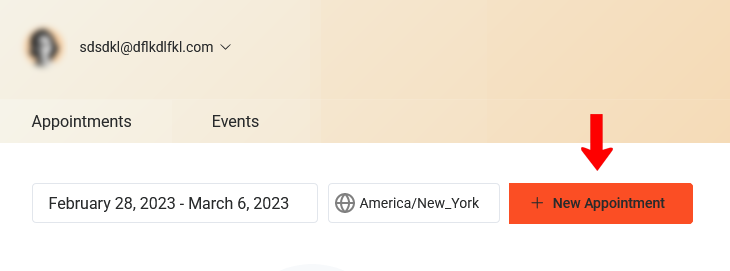
By default, your panel will open on the Appointments tab. Here you’ll be able to check your appointments booked by attendees, edit them and book an appointment yourself if needed.

You may also see an Events tab. These are special events that can be created by the Uncool Artist team administrators and that require booking. For now you can ignore this tab.

My Profile menu option

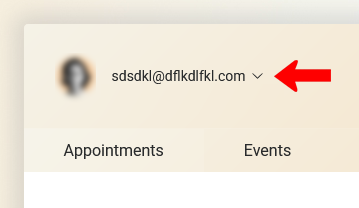
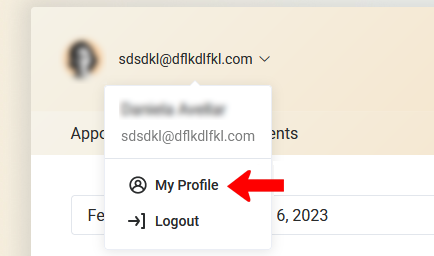
There will be an email account and an arrow down on the panel next to your avatar image. Click on the email account to bring up a menu, and click on My Profile.

This profile data is exclusive to the booking tool, so the information here will only appear for those who make an appointment with you, not being visible in other parts of the site.


This means you will have two profile pages available (the personal and the advisor profile). To avoid confusing the participants, we recommend keeping the same name and photo on both profiles.

Appointments Tab

Managing your appointments

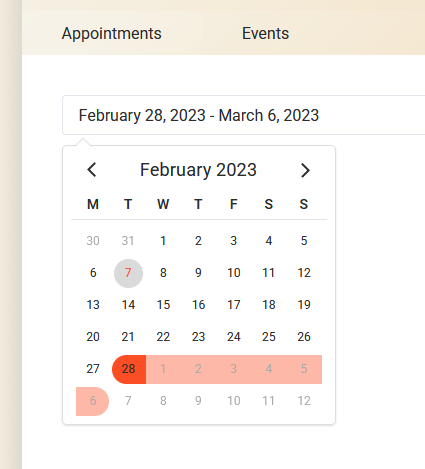
To check your appointments on the calendar, click on the initial search date and the final date so that the meetings scheduled with you can be listed within these parameters.


You can cancel, reschedule or reject appointments. In these cases, you should explain why you took this action to the participant who booked the meeting. Once one of these actions is taken, the system will automatically alert one of our team members, but for better practice, please contact a team member explaining your reasons.

Editing an appointment

Once a participant makes an appointment, you will be notified by email. If, for some reason, you need to reschedule or cancel the meeting, click the pencil icon.

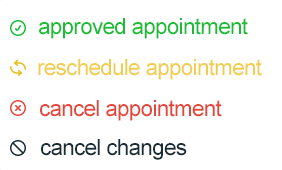
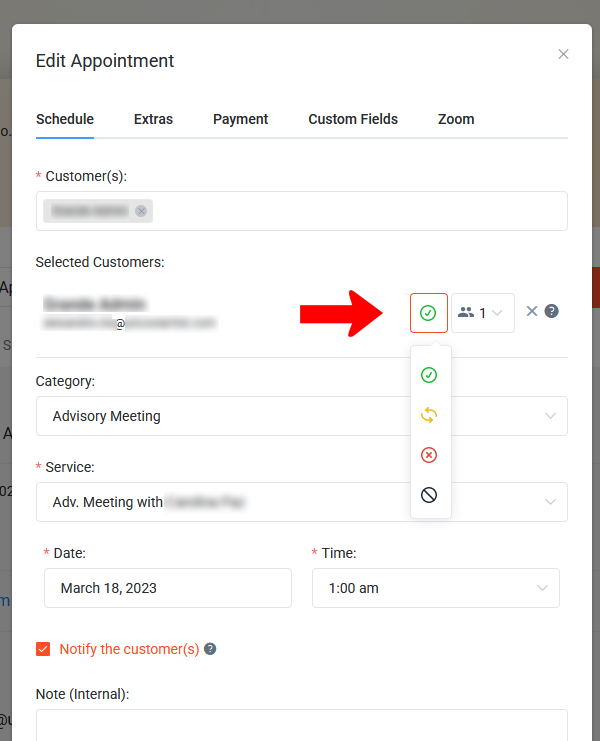
Change the colored icon selection from Approved appointment (green) to the desired option:

Yellow curved arrows: reschedule appointment
Red “x” inside circle: cancel appointment
Grey icon: cancel this selection

Please do not change other settings.

Rescheduling an appointment

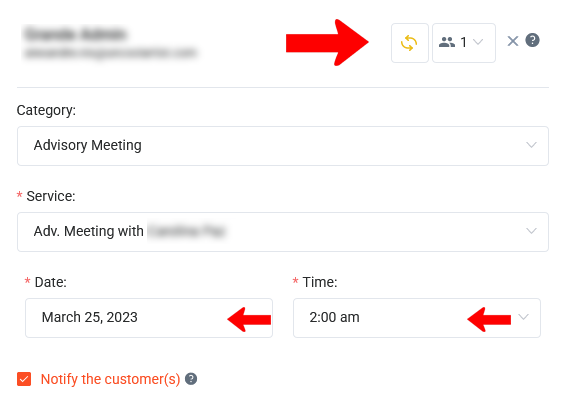
If you decide to reschedule an appointment, pick the new date and time on the corresponding fields and click the Finish button.


An automatic email will be sent to you and the person who initially made the appointment informing you that the new schedule is pending. You’ll also see the pending status for this appointment under your Appointments tab.


Once the person confirms the new date and time, a new email will be sent updating both parties.

Creating an appointment by yourself

Setting up meetings with participants in case of emergency (communication problems, system failures, or any other exception) is also possible. Just click the button with the option and fill out the popup form.


If you’re doing this, please notify one of our team members about this exception.

My Profile Tabs - Overview

Managing your profile

Details tab

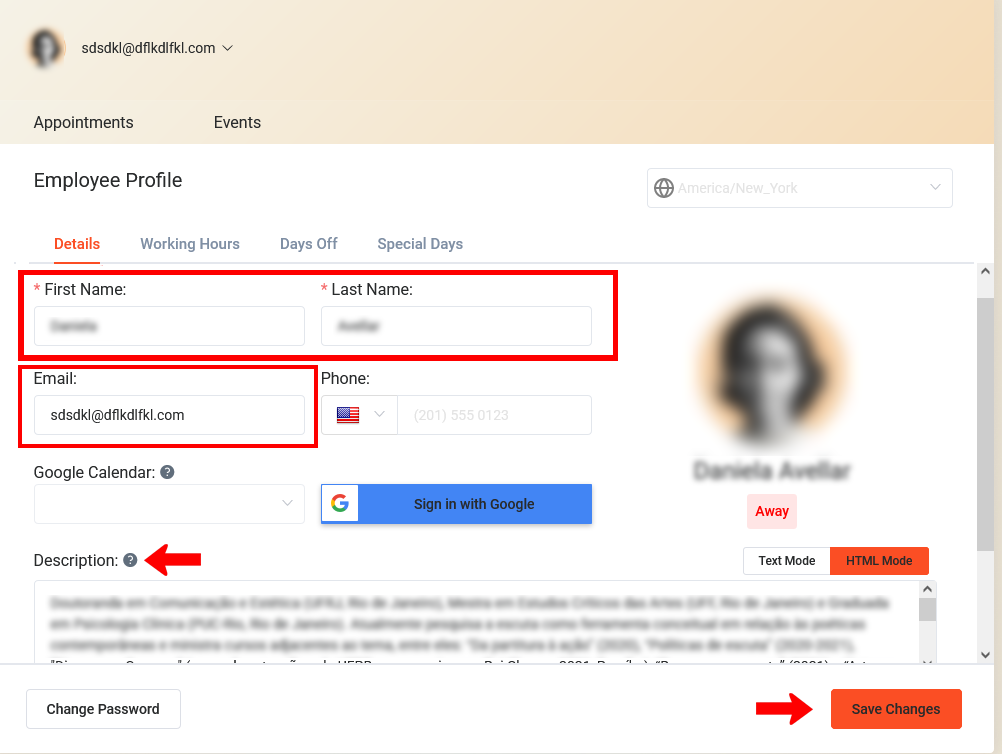
In the first tab, Details, you can change your email, photo, name and description of the service you provide.


First and last name, email and description are required fields. Please fill out these to better inform our participant’s about yourself.


Don’t forget to click the SAVE CHANGES button once you’re done.


Optional fields:

  • Phone number
  • Google Calendar (2-way sync. See more below)


Working Hours tab

In the Working Hours tab, you can manage your standard weekly available hours.


Days Off tab

If you have a day off that falls within your regular hours parameter, you can create one or more exceptions on the Days Off tab by marking the date(s) you will be unavailable.

Special Days tab

This feature allows you to configure one or multiple days when your working hours in one day or period are somehow different from the standard one. If you need to set shorter or longer working hours for just one day or a period, here you can do all of this.

It requires a more careful set up, so it’s ok to ask our team to help you.

By default, participants can make an appointment with an advisor up to 72h (3 days) in advance, but if you require more time in advance, please contact our team. Cancellations and reschedules must be made within 48 hours (2 days) of the appointment.

Google Calendar and advisor panel

If you use Google Calendar and use your Google email, then it is possible to create a synchronization between your Google Calendar and the booking tool so that if there is a cancellation of a meeting by a participant, this cancellation is automatically updated in your own Google Calendar.


How to connect your advisor panel with your Google Calendar

1- On the Details tab of your profile in the advisor panel, click the “Sign in With Google” blue button.

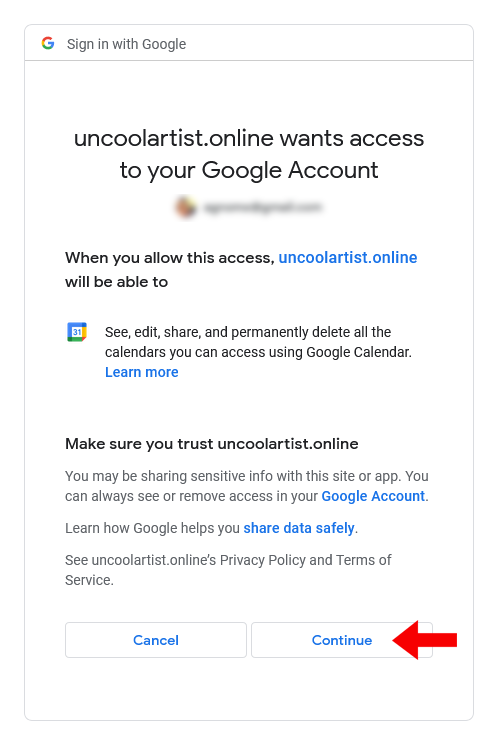
The system will open a tab for you to connect your Google Calendar through your Account. If you’re not connected yet with this browser you can connect to your Google Account now. If you’re connected you will see a message box asking you to allow this access. Google will try to warn you a couple of times that this could be unsafe since it has no knowledge of Uncool Artist. Don’t worry. The only powers the system will have is to schedule, cancel  or reschedule meetings created here by participants.


2- Clique the continue button.

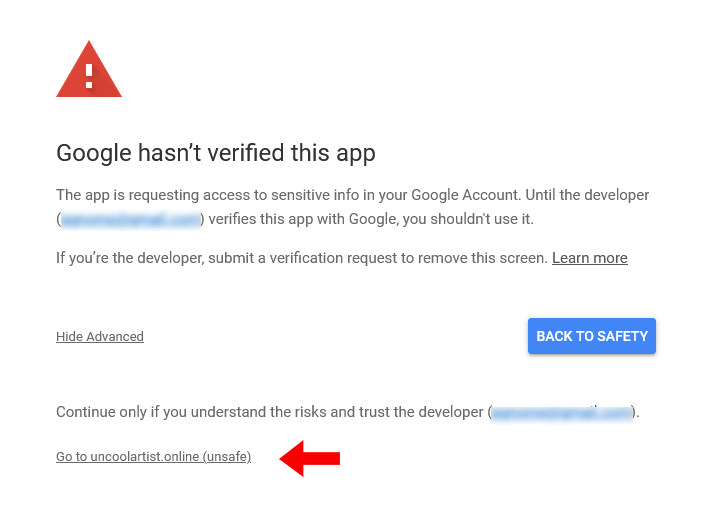
3. A new box will appear. Click on Advance.


4. Click on Go to uncoolartist.online (unsafe). It’s not unsafe.


5- If Google ask you to allow the connection once or twice now click the Allow button an you’re connected.

Managing Working Hours

This is where you set your custom working hours and breaks for any day of the week.


To set up your working hours, go to the Working Hours tab.


Add Your Working Hours

1. Click the plus sign icon of the desired week day to open a drop-down form.

2. Select the starting and ending hours.

3. Select your service.

4. Click the SAVE button.
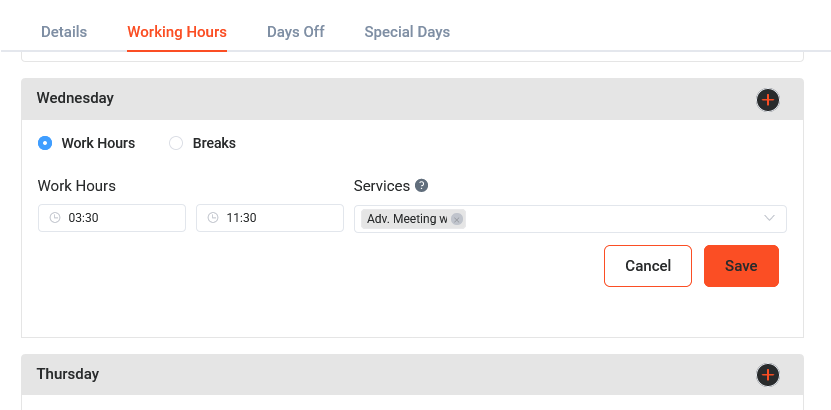
4. Repeat this process for all the week days you want to be available for appointments and click the SAVE CHANGES button at the bottom of the page.

Editing and deleting working hours

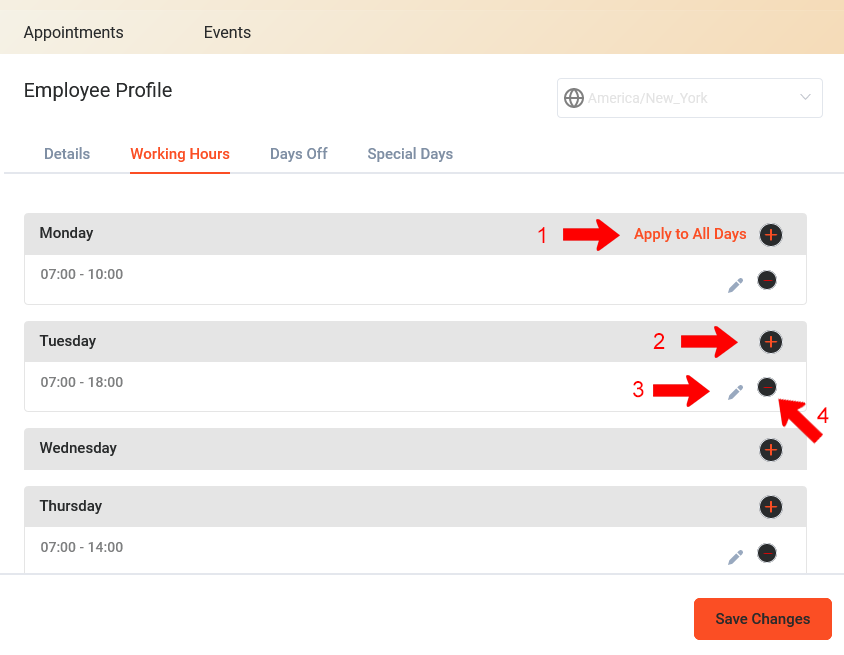
To edit a working hour period click the pencil icon of the desired week day.

To delete a working hour period click the minus sign icon (4) of the desired week day.


Extra

If you would like to set the same schedule for the entire week, simply configure Monday’s schedule and then click the Apply to All Days button (1) – this way the Monday schedule will be copied to all the other days.
 

Adding extra available hours in the same day

It is also possible to add multiple periods of time in the same day of the week. You can do this by simply clicking once more the plus sign icon (1) of a weekday to configure extras time periods.
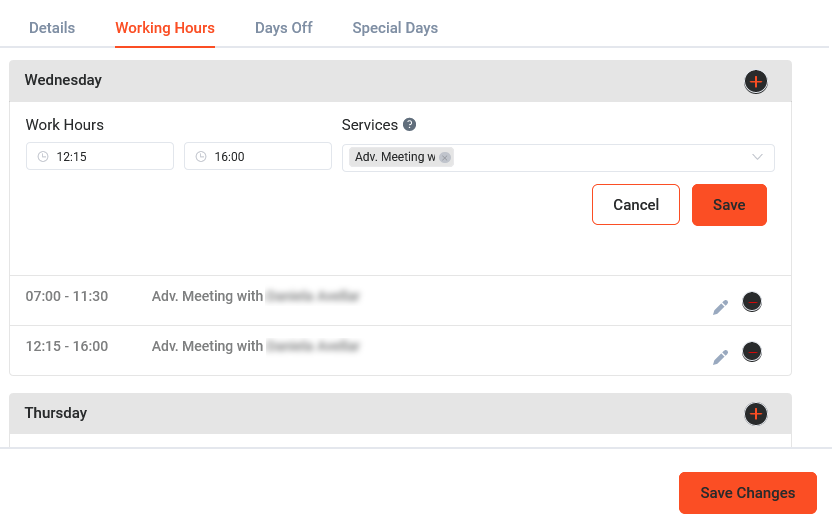
 

After you complete to configure you working days, click the SAVE CHANGES button at the bottom of the page.
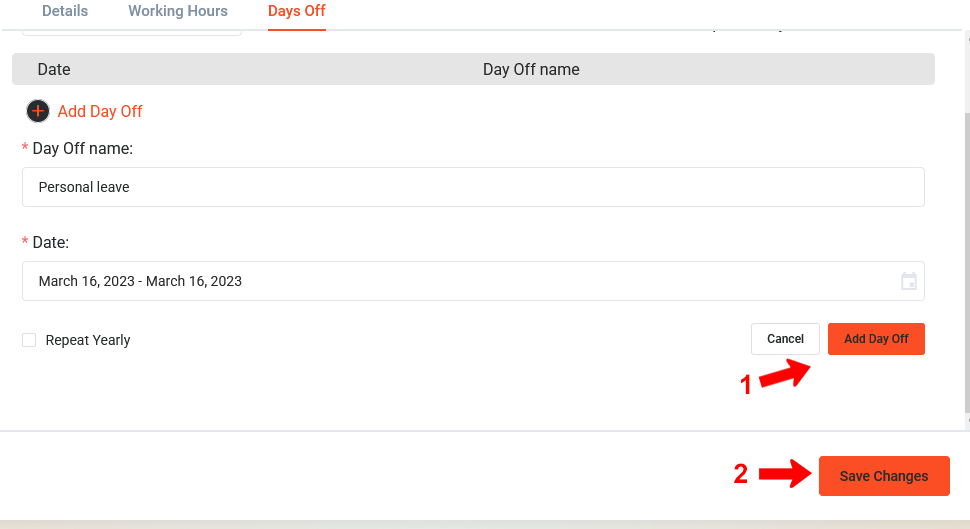
 

Managing Days Off

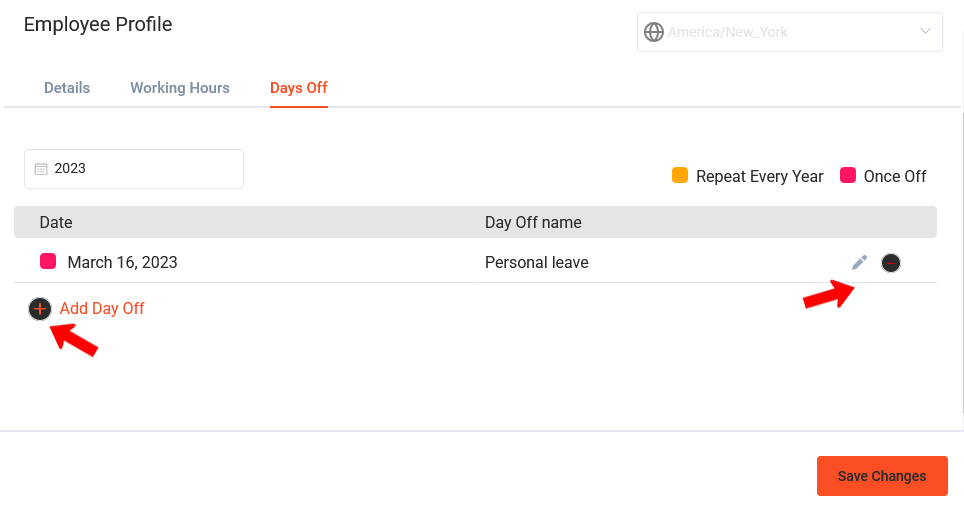
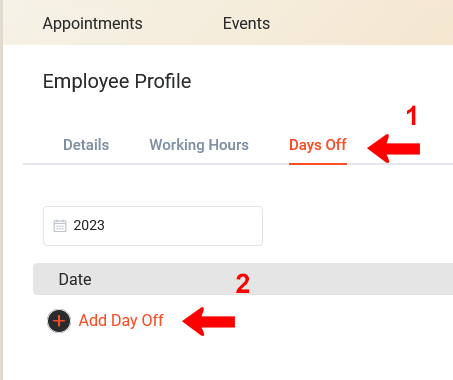
1- Go to the Day Off tab (1) and click Add Day Off (2) to set up a day off date.


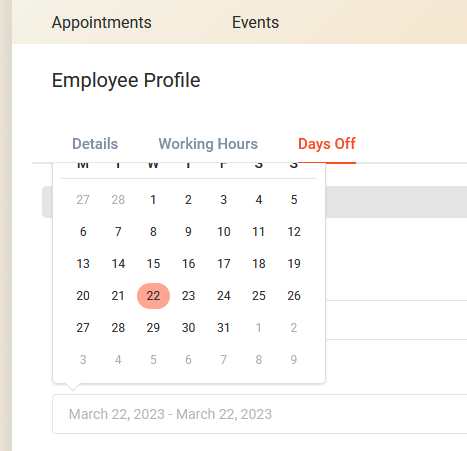
2- Type down the title of the day off and click the date field to open the calendar (Eg. “Personal leave,” “Travelling”). A title should inform a reason for the day off without being too personal.

3- In the “Date” selection field, choose a date or a range of dates. To select a single date, click twice on it. If you need more days in a row, click the first and last days off to choose the range.

4- Click the Add Day Off button to add the date and click the Save Changes button to finish the entry.


5- If you need to edit the Day Off info, click the pencil icon. If you want to delete it, click the minus sign. To add a new date, click the plus sign or the link Add Day Off on the left.


Special Days

Adding or editing Special Days (Advanced)

Suppose you have services only provided occasionally (not daily or weekly, but on specific occasions). In that case, this feature is a perfect match to configure such services. You can simply delete your working hours and use the Special Days, so the calendar on the front end will show the first available appointment slot. Once you configure it, it will override your general working hours, but it will not override your days off.

Note: Due to a system limitation, this advisor panel interface only allows admins to add Special Days to your schedule or edit them (and only allows you to delete them). To bypass this limitation, we created a workaround for you to access an alternative version of the advisor panel where you have complete control of this feature (see instructions below).

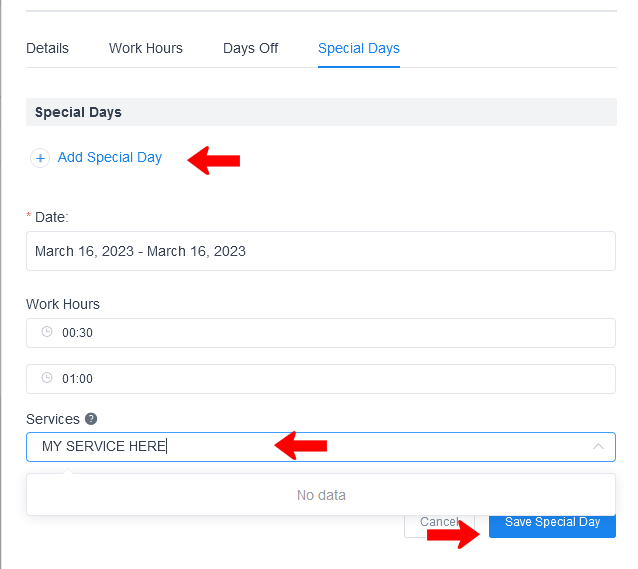
1- To set up or change special days, go to this page and click on your name card to open the alternative advisor panel.

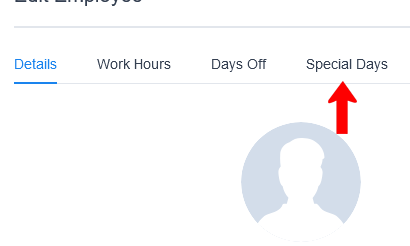
2- Click the Special Days tab.

3- Click Add Special Day to open the form.

4- Select your service and complete the form with the date and working hours.

In the “Date” selection field, choose a date or a range of dates, then set one or multiple periods with working hours. To select just one date at a time, click twice on it. If you need more days in a row, click the first day and the last day off.

5- After configuring the particular schedule, click the Save Special Day button to apply this schedule.

6- To exit this panel, click the Save Button on the bottom of the page and close the window/tab browser.

Editing Special Days

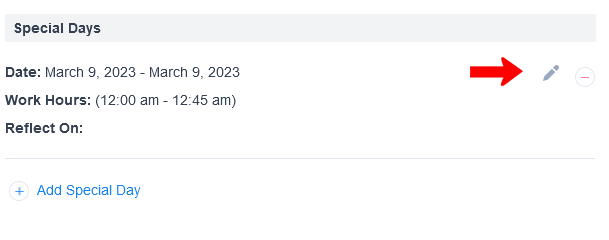
To edit the dates, you must access the Special Days tab in this alternative advisor panel and click the pencil icon on the right of the special day.


You can use the regular advisor panel if you need to delete special dates later.

Extra (for Introductory Advisory meetings)

If you are enrolled as advisor for Introductory Advisory meetings

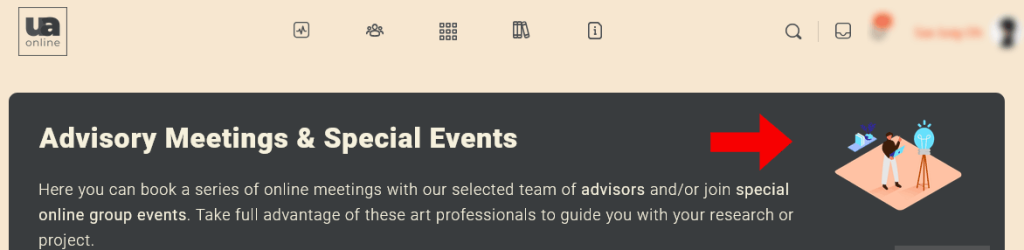
After the meeting with the participant, if you believe that he or she is ready to have general meetings, ask him/her to click on the first image of the Appointments page. It’s a secret link only clickable once for those who can have only Introductory Advisory meetings.


A popup will open for the participant confirm that the Introductory Advisory meeting was complete. You can tell the participant to do this and refresh the page. The image will change and the participant will have access to the general meeting booking form.